Automate your home lab with IaC (Proxmox + Pulumi)

If you’re running a Proxmox homelab, you know the drill: click "Create VM," select the ISO, set the RAM and CPU, configure the network, wait for the install... and repeat. It’s fun the first five times. By the twentieth time, you start wondering how it can be done more efficient.
What if you could define your entire home lab in a few lines of code? Not just a script, but a state-managed and version controlled blueprint. Enter Infrastructure as Code (IaC) with Pulumi.
What is IaC and Pulumi?
IaC is the practice of managing your IT infrastructure using configuration files. Instead of manual configuring all your servers, you write code that describes your desired state (e.g., "I want three Ubuntu VMs with 2GB RAM"), and a tool makes it happen for you.
Why Pulumi?
Most people in the DevOps world know Terraform. It’s great, but it uses a proprietary language called HCL. Pulumi does it different, it lets you use real programming languages like TypeScript, Python, Go, or C#. At the moment of writing, I am also doing research for my bachelors' thesis on how Pulumi performs compared to terraform in an enterprise cloud environment. That's more than enough theory for now, let's build something. If your interested in learning more about Pulumi, check out their website: https://www.pulumi.com/
Tutorial
Prerequisites
Before we start writing code, ensure you have:
- A Proxmox VE host up and running.
- Pulumi CLI: Installed on your workstation. https://www.pulumi.com/docs/get-started/download-install/
Create the template
First download the official Ubuntu cloud image to your Proxmox host:
wget https://cloud-images.ubuntu.com/jammy/current/jammy-server-cloudimg-amd64.imgCreate a new VM that will become the template:
qm create 9000 --name ubuntu-cloud-template --memory 2048 --cores 2 --net0 virtio,bridge=vmbr0Import the downloaded cloud image as the VM disk:
qm importdisk 9000 jammy-server-cloudimg-amd64.img local-lvmAttach the disk to the VM:
qm set 9000 --scsihw virtio-scsi-pci --scsi0 local-lvm:vm-9000-disk-0Cloud-Init needs a special drive that stores configuration data:
qm set 9000 --ide2 local-lvm:cloudinitSet the imported disk as the boot device:
qm set 9000 --boot c --bootdisk scsi0Enable the serial console:
qm set 9000 --serial0 socket --vga serial0Once everything is configured, convert the VM to a template:
qm template 9000You now have a reusable Ubuntu cloud-init template that can be cloned instantly when deploying new virtual machines.
Create your Pulumi project
Now that the template exists, we can start defining our infrastructure using Pulumi. I prefer using a git repo.
Create a token on: https://app.pulumi.com/account/tokens

Initialize a new Pulumi project:
pulumi new pythonEnter your token, you will be asked a few things. Leave them on default by clicking enter or change them according to your personal needs.
This command creates a new Pulumi project with the following structure:
.
├── Pulumi.yaml
├── Pulumi.dev.yaml
├── __main__.py
├── requirements.txt
└── venv/
Now we can install our provider for Proxmox:
npm install @muhlba91/pulumi-proxmoxveSetting Proxmox credentials
Now we need to set our Proxmox credentials:
You will need to make an API key in your proxomox datacenter settings under access.
pulumi config set proxmoxve:endpoint https://IP:8006
pulumi config set proxmoxve:apiToken "root@pam!pulumi=your-api-key-here" --secret
Pulumi will save this in: Pulumi.dev.yaml
Starting with a first VM
We will now write our first python code to set up a new VM in Proxmox.
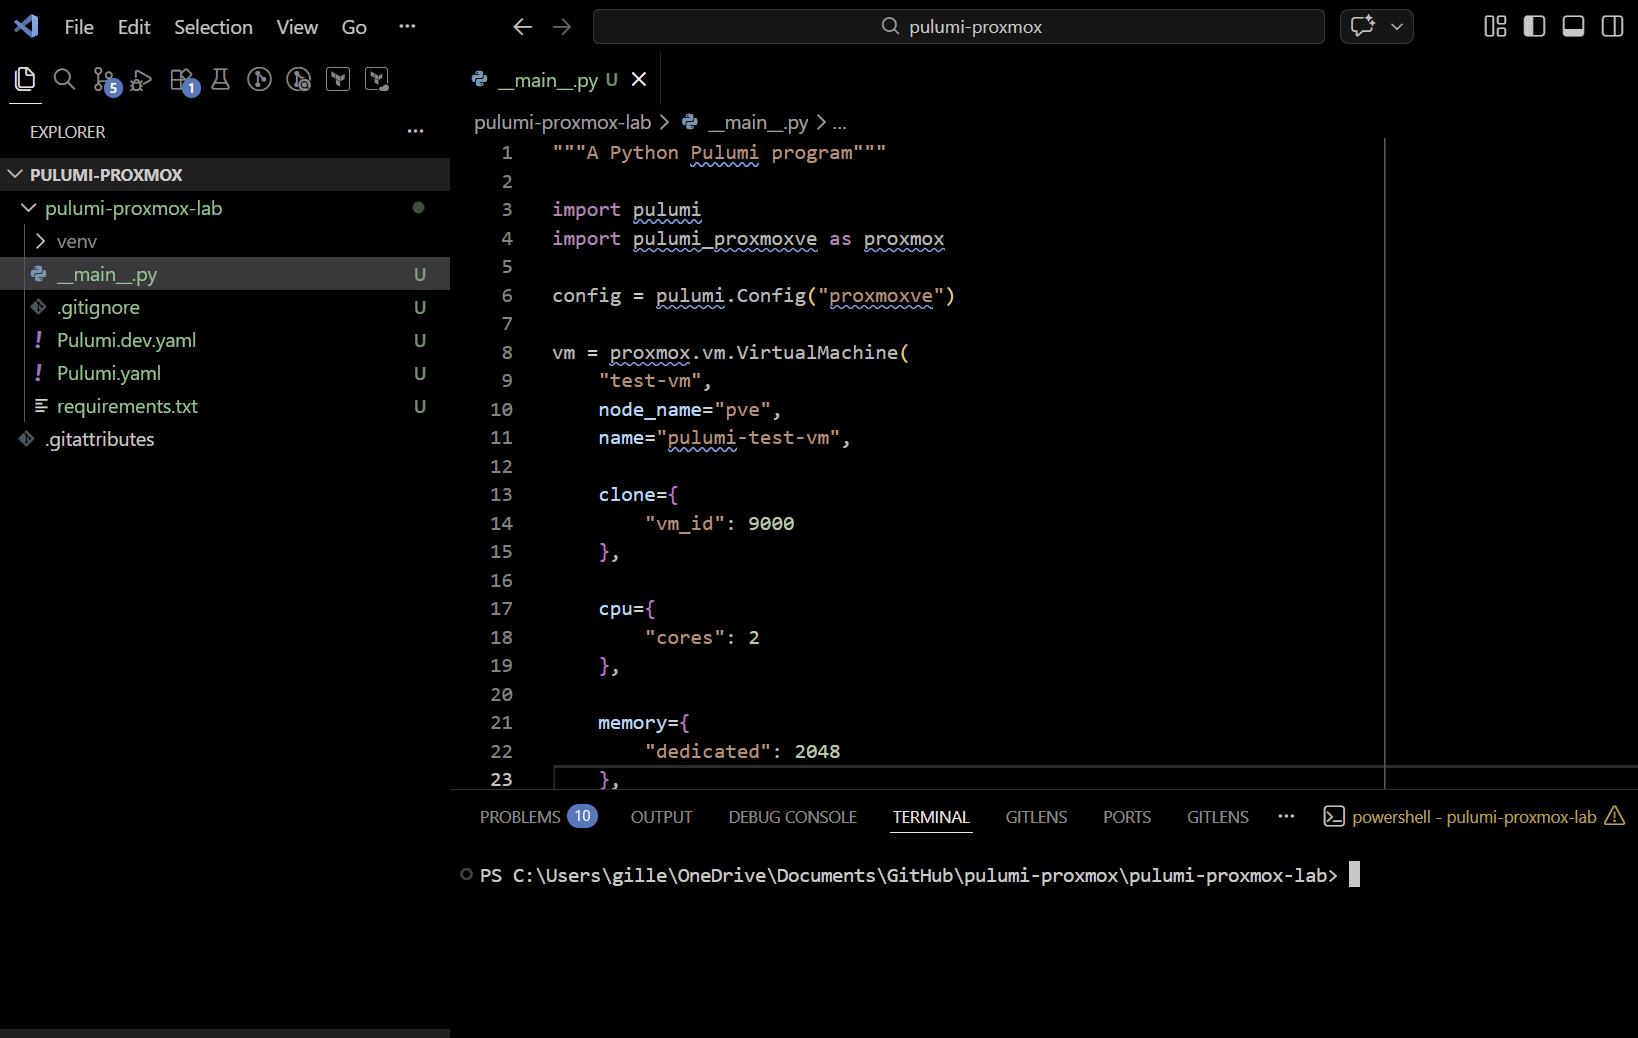
import pulumi
import pulumi_proxmoxve as proxmox

config = pulumi.Config("proxmoxve")

vm = proxmox.vm.VirtualMachine(
    "test-vm",
    node_name="pve",
    name="pulumi-test-vm",

    clone={
        "vm_id": 9000
    },

    cpu={
        "cores": 2
    },

    memory={
        "dedicated": 2048
    },

    network_devices=[{
        "bridge": "vmbr0"
    }],

    initialization={
        "ip_configs": [{
            "ipv4": {
                "address": "dhcp"
            }
        }]
    }
)
What does this python code do?
It:
- clones the template VM 9000
- makes a new VM
- assigns 2CPU cores
- gives it 2GB RAM
- Uses DHCP to request an IP for it
You can paste the code in your code editor and tweak it if you want.
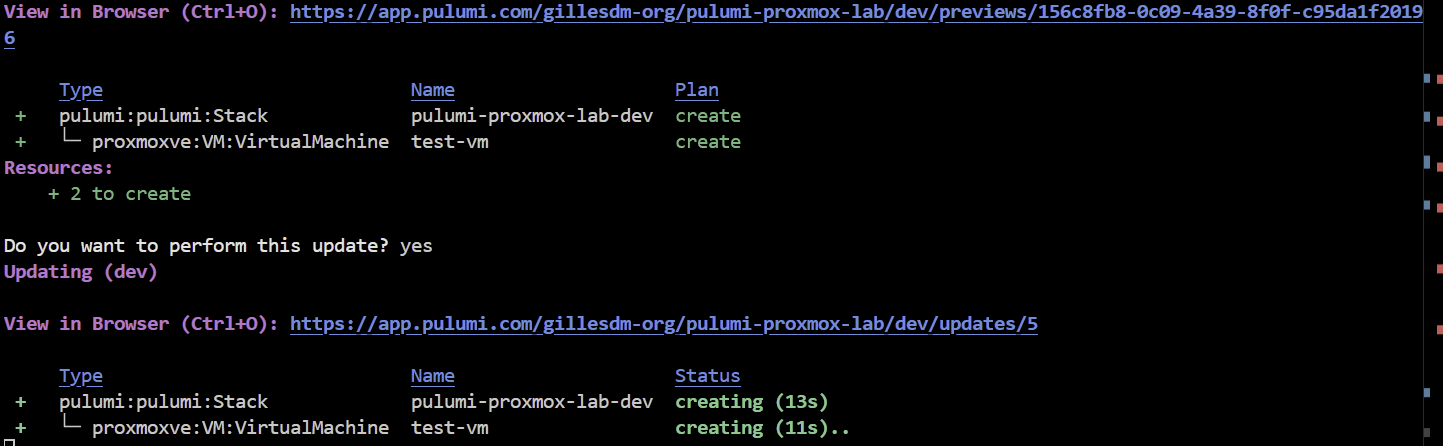
When we run:
pulumi upYou will be prompted if you want to execute this, move to yes with the arrows on your keyboard and click enter.

We can follow the creation of the VM:
We see the new VM in our Proxmox dashboard:

If you want to destroy the VM, just run pulumi destroy in your terminal and everything will be cleaned up.